
How To Fix Scratches In Polyurethane Floor
To fix scratches in polyurethane floor, start by cleaning the area thoroughly, then apply a matching touch-up pen, wax, or polyurethane maintenance product to disguise and blend the scratch. This method restores the floor’s appearance efficiently without requiring professional intervention.
- What are polyurethane floors?
- How can I identify scratches on my floor?
- Can scratches in polyurethane floor be prevented?
- What household items can I use for a quick fix?
- When should I seek professional help?
- What is the cost of repairing polyurethane scratches?
- Is it safe to use commercial repair kits?
- How durable are polyurethane floors after scratch repair?
The beauty and resilience of a polyurethane-coated floor make it a popular choice for both homes and commercial spaces. However, even the most carefully maintained floors can suffer from scratches, marring their pristine appearance. If you are looking to fix scratches in polyurethane floor surfaces, understanding the right techniques and products is crucial. This guide provides a step-by-step approach to restoring your surfaces to their former glory, ensuring longevity and aesthetic appeal.
Understanding Polyurethane
Polyurethane is a widely used finish for hardwood floors, beloved for its durability and glossy finish. As a protective layer, it guards the wood against wear and tear, making it ideal for high-traffic areas. Though tough, polyurethane floors are not immune to scratches, and knowing how to address these blemishes is vital for maintenance.
Common Causes of Scratches
Several factors can lead to scratches on polyurethane floors. Heavy foot traffic, moving furniture, and even pet claws can mar the surface over time. Identifying these causes helps you take preventative measures, such as using rugs or furniture pads, to minimise the incidence of new scratches.
At Abstract Floors, located in Tauranga, New Zealand, we frequently encounter clients seeking advice on maintaining their polyurethane floors. As industry experts, we stress the importance of correct cleaning agents and protective measures to extend the lifespan of your flooring. Our comprehensive approach provided in this article will walk you through everything from minor touch-ups to significant repairs, ensuring your floors remain immaculate.

Step-by-Step Repair Process
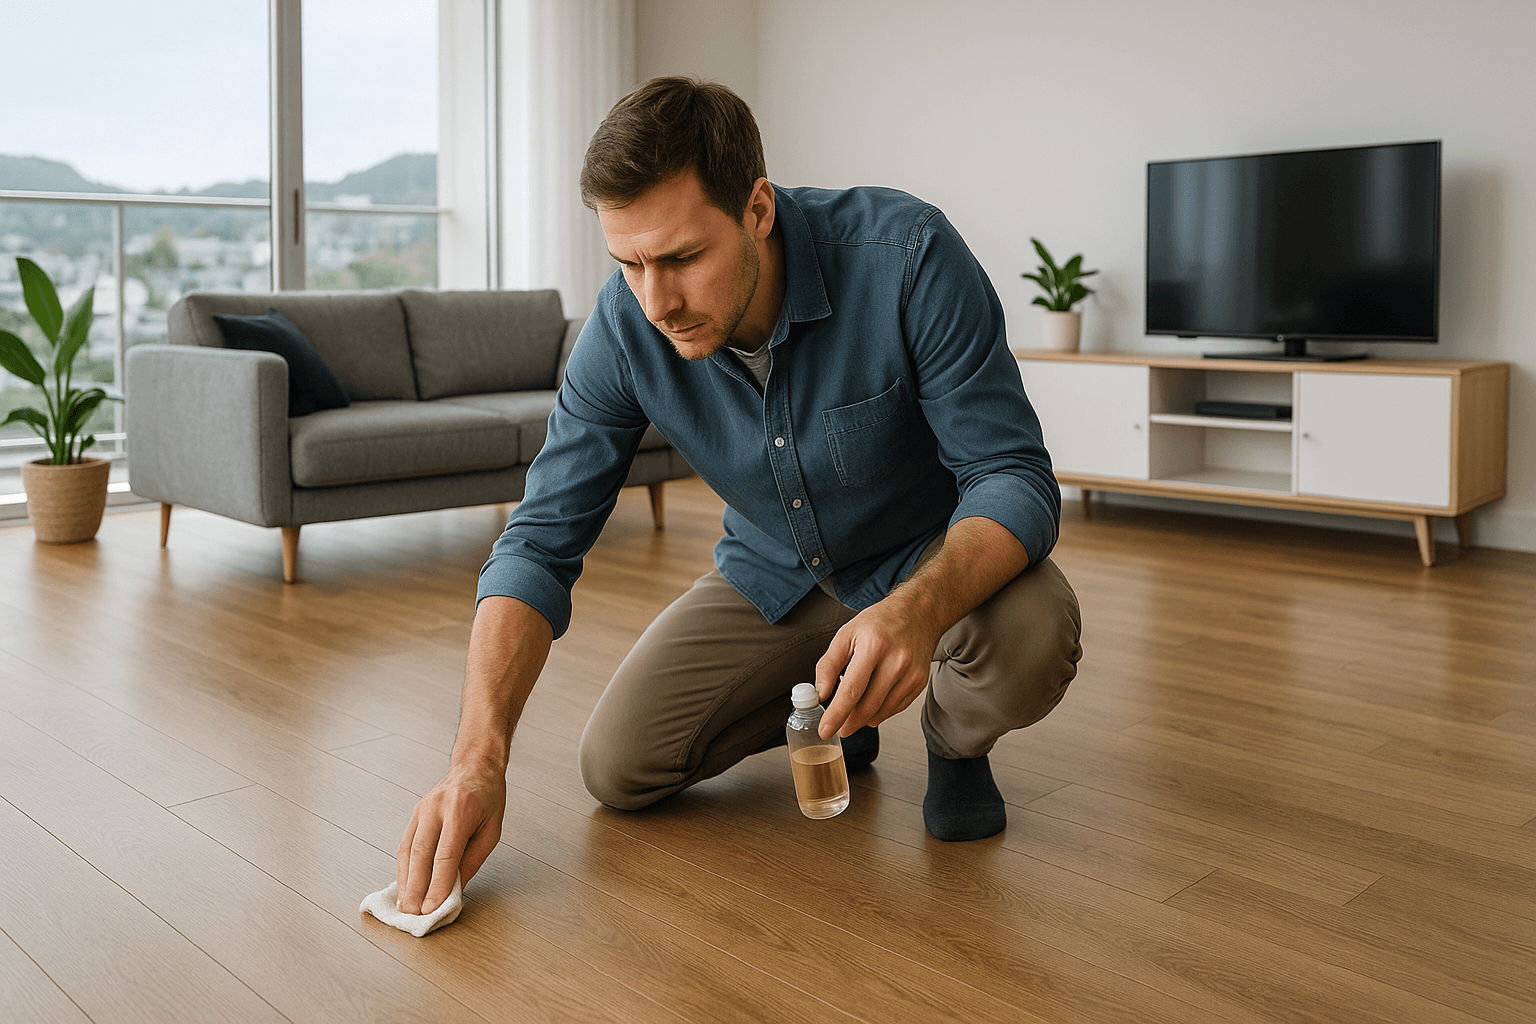
Repairing scratches on polyurethane floors may seem daunting, but with the right approach and tools, it is a manageable task. Whether you're dealing with minor surface blemishes or deeper gouges, addressing the imperfections promptly can restore the floor's original lustre and extend its lifespan. In this section, we will guide you through a comprehensive step-by-step process to effectively fix these scratches using simple tools and accessible materials found in many DIY stores around Tauranga.
Materials and Tools Needed
To start the repair process, gather essential materials and tools to ensure a seamless fix. You'll need fine-grit sandpaper (around 240 to 320 grit), a microfiber cloth, wood filler for deeper scratches, a compatible polyurethane finish, and a putty knife. These materials can be easily found at local hardware stores. For minor scratches, a repair kit that includes touch-up pens or markers may suffice. Ensuring you have these tools on hand will allow you to complete the repair efficiently and effectively.
Repairing Minor Scratches
For minor scratches, which often appear as surface-level blemishes, gently clean the affected area with a microfiber cloth to remove any dust or debris. Next, lightly sand the scratched area in the direction of the wood grain using fine-grit sandpaper. This will smooth the surface and prepare it for treatment. Once sanded, clean the area again to remove dust. Use a touch-up pen or marker that matches your floor tone to discreetly fill in the scratch. Apply a small amount of polyurethane finish over the area to seal and protect the repair, ensuring to blend it smoothly with the surrounding surface.
Repairing Deeper Scratches
Deeper scratches may require a more detailed approach. Begin by cleaning the area thoroughly, then use a putty knife to apply wood filler directly into the scratch. Smooth it over and let it set according to the manufacturer's instructions. Once dry, gently sand the filler flush with the surrounding floor using fine-grit sandpaper. Clean off any dust and apply a coat of polyurethane finish, allowing it to dry completely. If necessary, apply a second coat to ensure the repair is seamless and well-protected against future wear.
Preventing Future Scratches
Beyond fixing existing scratches, implementing preventive measures is crucial to maintaining your floor's pristine condition. Consider using rugs or mats in high-traffic areas to reduce wear, and attach felt pads under furniture legs to prevent them from digging into the floor. Regular cleaning with non-abrasive tools will help maintain the protective layer of polyurethane and keep the floor looking new for longer. By adopting these simple but effective preventive strategies, you can enhance the longevity of your polyurethane flooring.
DIY Kits and Professional Services
Once you've familiarised yourself with the step-by-step process for scratch repair, it's important to decide whether to take a do-it-yourself approach or enlist professional services for optimal results. This decision will depend on the extent of the damage and your confidence in handling such tasks. Let's take a closer look at the pros and cons of each method.
Benefits of DIY Kits
DIY scratch repair kits are widely available and offer a cost-effective solution for minor scratches. These kits typically include essential materials such as sandpaper, filler, and polyurethane finish, enabling homeowners to address simple imperfections swiftly. Using a DIY kit can be empowering, allowing you to learn new skills and conveniently manage small repairs at your own pace. Additionally, DIY kits provide flexibility, as you can tackle the repairs whenever it suits your schedule, without needing to book an appointment with a professional.
Limitations of DIY
However, it's crucial to recognise the limitations of DIY kits. They may not always match the original floor finish perfectly, leading to visible discrepancies, especially for severe scratches or extensive damage. Moreover, without prior experience, there is a risk of exacerbating the problem, possibly resulting in further damage or uneven finishes. DIY kits require a level of precision and patience to ensure a seamless repair, which not all homeowners possess.
Advantages of Professional Services
Engaging professional services in Tauranga can bring peace of mind, especially for larger or more complex repairs. Experts in polyurethane floor repair come equipped with specialised tools and knowledge to ensure the restoration is expertly conducted, matching the original finish accurately. While this option might entail higher costs, the assurance of a professional outcome can outweigh the expense. Furthermore, professionals tend to complete repairs more swiftly, freeing up your time for other priorities.
When to Consider Professionals
If your floor exhibits extensive damage or if previous repair attempts have failed, it is advisable to consult professionals. Significant gouges or multiple deep scratches often require the expertise and precision that only skilled professionals can provide. Additionally, professional services can offer warranties on their work, providing you with additional security and confidence in the longevity of the repair. Ultimately, the choice between DIY and professional services comes down to the extent of the scratches and individual preferences.
Overall, understanding the scope of the damage and your comfort level with DIY repairs can help determine the best course of action when tackling polyurethane floor scratches. With both solutions offering distinct advantages and drawbacks, it's essential to assess your situation and choose the appropriate path for effective and satisfying results.
Why Choose Abstract Floors for Fixing Scratches in Polyurethane Floors
When it comes to restoring the beauty of your polyurethane floors, selecting the right professionals is crucial. At Abstract Floors, we offer a blend of local expertise, unmatched craftsmanship, and a commitment to customer satisfaction that stands out in the flooring industry.
Experienced Local Experts
Based in Tauranga, New Zealand, Abstract Floors is deeply rooted in the community, understanding the specific needs and preferences of local homeowners and businesses. Our team brings years of experience and technical knowledge, ensuring that every project meets the highest standards of excellence. By choosing a locally-based company, you benefit from our fast response times and personal touch, qualities that distant national chains simply can't match.
What Sets Us Apart
What truly differentiates Abstract Floors is our dedication to tailoring solutions specifically to your flooring needs. Whether it’s a minor touch-up or major renovation, we approach each task with meticulous attention to detail and innovative techniques. Our commitment to superior service extends beyond just fixing scratches—it includes using top-quality materials that enhance the longevity and appearance of your floors. Furthermore, we are proud of our stellar reputation, validated by numerous satisfied clients who trust us to bring their floors back to life.
By choosing Abstract Floors, you not only rely on local expertise but make an investment in quality and lasting beauty for your home or establishment. To gain further insights on ways to fix scratches in polyurethane floor check out other sections of our comprehensive guide.
Contact UsUp next, our detailed FAQ will address common questions about fixing scratches in polyurethane floors to provide you with the clarity and confidence you need moving forward.
Frequently Asked Questions
What are polyurethane floors?
Polyurethane floors are a type of flooring finish made from synthetic materials that provide durability, water resistance, and a modern appearance. They are commonly used in both residential and commercial spaces.
How can I identify scratches on my floor?
Scratches on polyurethane floors often appear as white or pale lines that disrupt the shiny finish of the floor. Their visibility depends on the depth and lighting conditions in the room.
Can scratches in polyurethane floor be prevented?
Yes, scratches can be minimised by placing rugs in high traffic areas, using furniture pads, and ensuring that floors are kept clean and debris-free. Regular maintenance is key to keeping the appearance intact.
What household items can I use for a quick fix?
Minor scratches can sometimes be lessened with a mixture of baking soda and water, carefully applied using a soft cloth. However, always test on an inconspicuous area first.
When should I seek professional help?
Seek professional intervention if scratches are deep, numerous, or if your attempts to repair them haven't succeeded. Abstract Floors in Tauranga offers skilled help to restore your floor's appearance.
What is the cost of repairing polyurethane scratches?
The cost varies based on the severity of the scratches, size of the area, and whether you choose DIY kits or professional services. Contacting a local expert can provide a more accurate estimate.
Is it safe to use commercial repair kits?
Yes, commercial kits are generally safe for home use if you follow the instructions carefully. Choose reputable brands to ensure the quality of the products.
How durable are polyurethane floors after scratch repair?
With proper repair, polyurethane floors can maintain their durability and visual appeal. Regular care and maintenance will help in prolonging the floor's lifespan post-repair.